Microsoft Office 2011 For Mac Installation Instructions
Note for Mac users: Office 365 ProPlus allows you to install Microsoft Office 2016 only if you have OS X 10.10 or later. After installing Microsoft Office 2016, your Microsoft Office 2011 applications (if previously installed) will still exist in Applications in a folder titled Microsoft Office 2011.

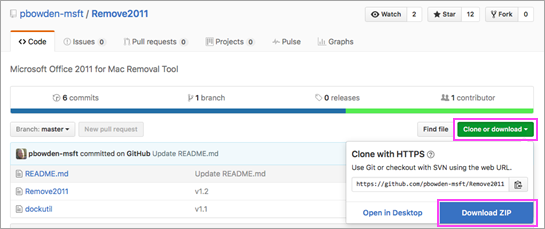
Download Microsoft office 2011 for Mac (Free Trial) – Yes, you can now download, install and try Office 2011 free for a month (30 days to be precise)! We earlier told you about the Office for mac 2011 release and its enhanced features. But there wasn’t any free trial made available then, and users could only try Microsoft’s Office 2008.
- Using Outlook on the web (webmail.stanford.edu), click the app launcher in the upper left-hand corner and then click Office 365.
- Click Install Office > Office 365 apps.
Note: Office 365 ProPlus includes Word, Excel, PowerPoint, Outlook, and OneNote. Office 365 ProPlus for Windows also includes Access, Publisher, and OneDrive for Business. - A file downloads to your computer. Once the file has finished downloading, click the file and go through the installation steps.
This screen shot shows the Windows instructions. Mac instructions are similar but slightly different. Docker for mac volumes location. After Office 365 ProPlus has finished installing you need to sign in to Office with your Stanford Office 365 account.
Windows: Click Start > My Office. Open any app (e.g., Word), click Accept and start <program name>. How to get csv to keep leading zeros in excel for mac.
Mac: Open your Applications folder and click a Microsoft app (e.g., Microsoft Word.app). In the application name menu (e.g., Word) click Activate Office. Sign in with your Stanford email address and click Next. Authenticate using two-step authentication.